Thursday, September 22, 2011

The Libby Top Sew-A-Long

I am in love with the blog Craftiness Is Not Optional (aka: CINO).
Jess makes some of the cutest little girls clothing ever!
On top of that, she shares some wonderfully done tutorials on how to make them.

On Monday she started the Libby Top sew-a-long.  
It lasted three days and was a blast to participate.  
It was my first sew-a-long and certainly won't be my last, if she
posts more.  

WARNING: Crappy pictures ahead!

It was raining and overcast when I went to take my pictures.
I couldn't get a decent photo indoors as it was too dark in the house so I quickly
took my garment stand outside, plopped it down and snapped a few shots.
I didn't have time to straighten or primp the top or it would have gotten soaked
and I would have been drenched

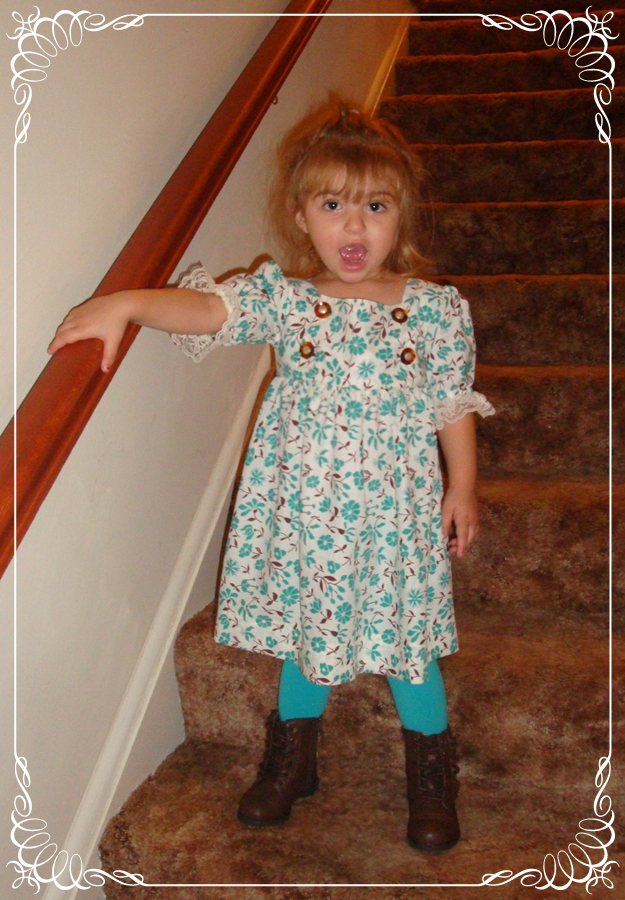
This is my finished top.

A view of the back.

I strayed a little from the tutorial as it was written and added some piping
and bias tape to the edge of the bib portion of the bodice.
I love the dimensional quality it gives. 
I don't know if it shows up well on your screen but, 
the orange fabric is glittered. 

I also made my sleeves differently.  I followed the tutorial for measuring and cutting
but instead of adding bias tape to finish the lower sleeve edge I gathered it.
I added some more bias tape to coordinate with the bib detailing. 

I just love this little top and plan on making some black pants to match.
I am thinking of adding ruffles to the bottom of the pant legs using
the orange and print fabric from this top.

As they stitch up so quickly, I plan on making two more 
of these Libby tops for each of my great nieces.

Why not head on over to Jess's site and try one for yourself?
I promise you won't be disappointed!


Until next time, 

Friday, September 16, 2011

Junebugs Everywhere!


This morning I completed another Junebug Dress from the tutorial posted by 

As I had mentioned previously, a friend had given me a LARGE stash
of fabric a long while ago and in it were some very vintage prints.
As fall is quickly approaching here, I wanted to make a dress to
reflect the season that could also be worn well into winter.

Here is the fabric I chose.
Doesn't it just scream Autumn!

And here is my finished dress.

Although I have never sewn it before, I decided to try rick rack
around the chest flap. I love the look but wasn't to happy
with the way I sewed it on.  Need to find a tutorial on how to round 
corners with it.  I couldn't get it to lay flat so I ended up sewing it to
each side and trimming it. When I turned it right side out, 
the trim pulled in even though I clipped and trimmed the corners.

I couldn't believe I found the exact shade of trim as was in the dress.
I know it looks orange but it is more of a burnt orange color.
The buttons matched up pretty well too.

Once I had the dress completed, I felt that the bottom looked a 
little bare so I added a row of rick rack about 2.5 inches from the bottom.

As with the last Junebug dress, I made the sleeves longer and
added wide lace to them.

I am keeping my fingers crossed that this will fit my great niece, CiCi.
I enlarged it to an approximate size 4.
Although she is only 2 years old, she is, ummm...lets say a healthy
little dumpling. She is not overweight but, is fuller in the waist and
upper body than most toddlers her age.

Sorry my pictures are so bad.  The sun was shining when I started taking
them but then the clouds came in when I was finishing up.

Thanks again Jess for such a wonderful, easy to follow tut!


Until next time, 

Monday, September 12, 2011

Ice Cream Sundae

Today is my friend Becky's birthday.
She is such a wonderful person. One of those people you really, truly admire.
Because she is so sweet, what better way to present her gift 
than in an ice cream sundae gift card holder.


I had seen this idea made into a cupcake and made a few of those
as gifts.  Everyone that received one raved about them.

When you pull out the cherry, it reveals the gift card inside!

While at one of the dollar type stores a while ago, I found these plastic
ice cream sundae bases.  At the time, I didn't know what I would make with 
them but I picked a couple up anyway. I'm so glad I did!


I think the tall bases make them more substantial looking.


The original cupcakes called to paint the wooden knob red and then coat 
them in glue and sprinkle with red glitter.  
On this sundae I painted the knob red and once dried I coated it with
sparkle nail polish. I really like the looks of it.


When I finished the sundae I thought the base needed
 a little something so I added this bow.  
As an afterthought, to add a little more pizzazz and up the cuteness factor, I added a crazy straw. 
I know it doesn't match color-wise but it's the only unused one I had on hand.


Until next time, 

Sunday, September 11, 2011

Junebug Dress Modeled

Today I presented the Junebug dress to my niece, Korallynne.
She was so excited when she saw it that she wanted it put on right away.

She was so cute and kept saying "Priddy".

She was the best little model.
This is the shot I got when I told her to turn around 
and show me the back of the dress.

I was lucky enough to find leotards that were almost the exact
shade of turquoise that is in the dress!

I was disappointed that I wasn't able to find any brown shoes. 
But, as it turned out, I'm glad I didn't because I found these brown ankle boots that were adorable.
You can't tell in the pictures but they have a leather ruffle on each side and they laced up the front.
Kind of reminds me of the "Little House on the Prairie" look.

The photo shoot didn't last very long.
When I got this look from my model, I knew it was over!
That's a two year old for you!


Until next time, 

Thursday, September 8, 2011

The Junebug Dress

Today I have finished up a Junebug Dress that I made from the tutorial posted at 
To go directly to the tutorial click here.  
While your there, check out the other great projects and tutorials as Jess has some fantastic ones!


I wanted to make a tester dress so I chose this fabric I had in my stash that a friend had
given me a long while ago. The colors are trendy but I wasn't fond of the print. 
The fabric is definitely vintage and has a lovely hand to it. 
Now that it is finished I have changed my mind and am quite fond of it!


The front has a button up flap.  
Love the fact that there are no zippers to deal with.
I absolutely hate sewing in zippers.

I used the size 2/3 pattern that Jess provided in the tutorial.
It will be going to one of my great nieces.  
Both are two years old but wear a size 3.

I changed a few things up from the original tutorial.
I made the sleeves longer as it is going into fall now 
and I added lace to the sleeves also.
I'm thinking of pairing the dress up with a brown turtle neck and the same color leggings.

I also made the skirt of the dress fuller than what the tutorial called for.
I couldn't decide on what buttons to use.  
As this was a tester dress I didn't want to have to buy anything to make it.
I scrounged through my button tin and found these vintage ones.
Although they are not the exact brown in the dress, I think they compliment
the vintage fabric and old time feel that the dress took on.

I am also going to stop calling it a tester dress now as it came out
better than I could have imagined.  For that I have Jess to thank
for such a fantastic, easy to follow, tutorial!
Thanks Jess!

I'm going to be whipping up another one real soon.
I'm thinking of all the possibilities for trims!
Ric rac around the button up flap, ribbon along the bottom, the ideas are just flowing! 


Until next time,